How to Install a Replacement Bathtub
by Guest on Nov 15, 2014
Although bathtub installation is typically left to the professionals and isn’t an easy DIY plumbing project because it involves working with a large, heavy object in a small space, it is possible to install a replacement bathtub without having to rely on the pros. While changing out your old tub with a new shower or bathtub isn’t a super difficult job, it’s guaranteed to be time consuming. Here are some tips for installing a replacement bathtub.
Preparation
Before you can start removing your old bathtub, you’ll have to spend some time preparing the area and giving yourself some space to work. If your walls are tiled, experts recommend removing and replacing these as well. The first step in installing a new tub is to set a ledger board in place. This board supports the edges of the tub that make contact with the walls of the tub enclosure. First, push the tub into the enclosure ad mark the top of the flange on the wall studs with a pencil. Measure and mark the location for the top of the ledger, which is usually about one inch below the first mark. Use drywall screws to fasten the ledger board horizontally and level across the back wall of the enclosure. Then, fasten shorter ledger boards to the end of the enclosure, level with the board you installed on the back wall.
Hook up Plumbing
Since it’s easier to install the pipes before the tub is permanently installed in the enclosure, you should turn the tub over so it can rest on its side and follow these steps:
- Install the show fitting by following the manufacturer’s directions,
- Assemble the overflow fitting with the overflow pipe,
- Place a bead of plumber’s putty around the drain flange and wrap Teflon pipe tape around the threads on its body,
- Place a rubber washer on the shoe and position the shoe under the tub,
- Screw the drain flange into the shoe,
- Tighten the drain flange, and
- Place a rubber washer on the overflow drain and install the overflow cover with the provided screws.
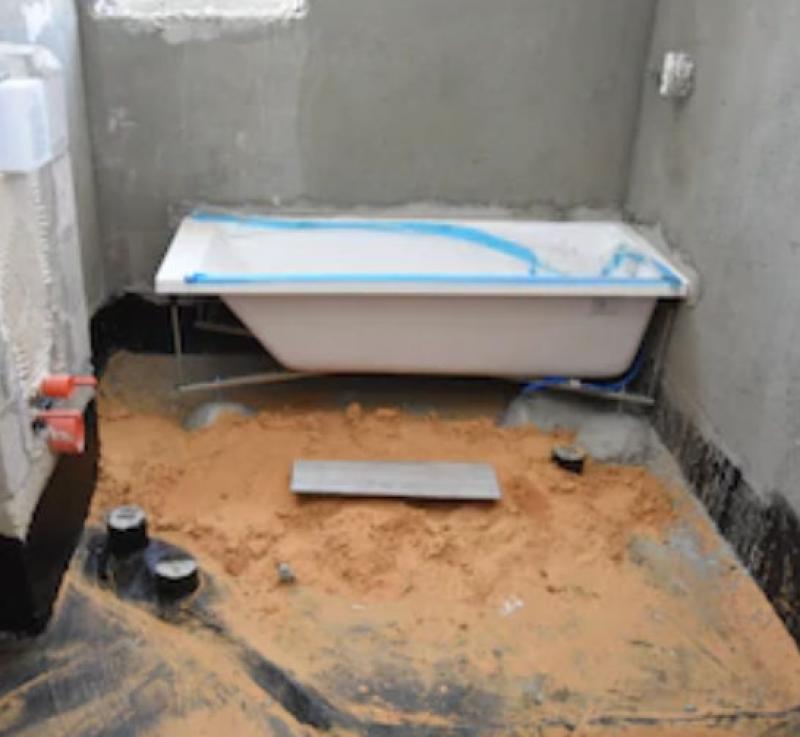
Secure the Tub
Once the plumbing is hooked up, it’s time to permanently secure the tub. Mix a batch of mortar according to the package directions and, with a notched trowel, spread a 2-inch layer of mortar on the subfloor where the tub will sit. Life the tub in place and position it so it’s tight against the walls. Once in place, secure the tub with the studs and nails provided by the manufacturer.
Popular Articles
Three Places to Spend Money on the Exterior of Your Home
When you have the exterior of your home remodeled, you are investing, time, energy and convenience into the project and you want to make sure that...
95790 Views
Homemade Headboards-Make an Upholstered or Wooden Headboard
Homemade headboards can add a lot of personality to any bedroom. They can be coordinated with existing furniture and room decor or they can be the...
74454 Views
When to Use a Brush, Roller or Sponge Brush
Brushes are a good choice for painting trim and woodwork. They are also useful for cutting in the edges around the top and bottom edges and corners...
71821 Views
Creating a Cottage Kitchen with Bead Board
Kitchen decor can range from modern and bold to elegant and elaborate by using strategic kitchen pieces. One of the most popular decorating trends...
52898 Views
Gas Fireplace Diagnostics and Troubleshooting
Follow these steps for diagnosing and troubleshooting Gas Fireplaces repairs. For the average DIYer, this may seem intimidating, depending on the...
30639 Views
Latest Articles
How Much Does It Cost To Take A Bath?
Plumbers know that a bath may seem like a relaxing luxury, but the real cost extends far beyond your water bill. The average soak uses 35 to 50...
on Apr 8, 2025
10 Concrete Patio Ideas on a Budget
A concrete patio can be a game-changer for your outdoor space. It is durable, versatile, and can be customized to fit your style. But what if you...
on Mar 25, 2025
Tips for Creating a Stunning Personalized Photo on Canvas
Order the unique beauty of a personalized photo on canvas and bring your memories to life. With a customized photo on canvas, you can transform...
on Mar 7, 2025
Best Areas to Buy Property in Singapore for Long-Term Growth
Singapore's real estate market remains one of the most stable and lucrative in the world. With limited land supply, strong governmental...
on Feb 18, 2025
Troubleshooting Excess Water in Your HVAC Secondary Condensate Drain Pan
When maintaining your air conditioning system, it is easy to overlook the condensate drain pan - until excess water starts pooling in places where...
on Jan 12, 2025
Featured Articles
What Type of Licensed Contractor Should You Hire?
on Feb 28, 2017
Hire Contractors / Estimates

Looking for a specialty project? There are many types of contractors available for your home improvement needs. Finding the right type of...
Sponsored Articles
Best Areas to Buy Property in Singapore for Long-Term Growth
on Feb 18, 2025
Real Estate / Finance

Singapore's real estate market remains one of the most stable and lucrative in the world. With limited land supply, strong governmental...
Actions
Top Categories
- Garden / Landscaping / Patio — 264
- Kitchen / Bathrooms — 240
- Real Estate / Finance — 203
- Appliance / Repair — 186
- Interior Design / Decor — 184
- HVAC / Air Conditioning — 148
- Cleaning / Maintenance — 144
- Improvements / Remodeling — 131
- Plumbing / Basements — 118
- Floors / Tile / Hardwood — 116
- Doors / Garages — 113
- Safety / Security — 113
Articles Archive
More DIY Articles
How to Install Your New Front Door
When it comes to DYI, there are tutorials on just about anything. From hanging new lights to redecorating a whole room, you can just about do...
6 Cost-Effective Home Improvement Tips
Everyone wishes to make his/her home much more beautiful and functional. However, these days where things are getting costlier enough, one would...
The Advantage of Pool Fencing for Children
Pool fencing can be a smart way to safeguard kids and pets from obtaining submerged inside the swimming accidentally. Aside from safety, fences...
Points to Consider When Hiring a Pest Control Professional
If you are having a problem with pests in your home then you need to deal with it as quickly as possible, before too much damage is done. The best...
Ten Benefits of Choosing Wire Balustrade Systems for your Stairs
If you’re looking to install a new balustrade system with your baluster, you have a variety of options to select from. Whether it’s timber,...