The Appeal of Natural Stone Floors
by Guest on Mar 20, 2013
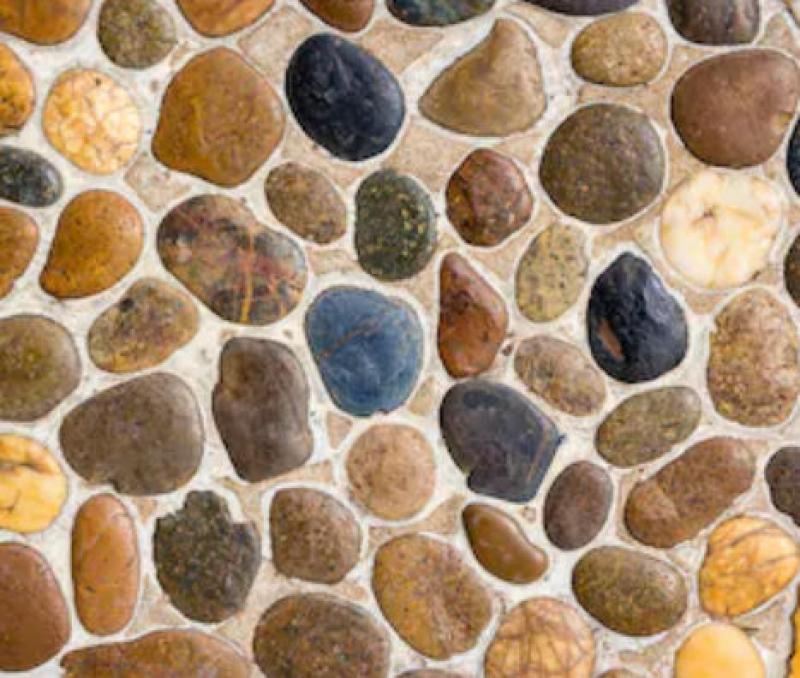
Stone floors are beautiful and enduring, with a history dating back to its use in the Egyptian Step Pyramid. Ever since its invention in 2630 BC, stone flooring has lent an air of class and permanence to any structure. It is the floor of choice for religious, government, and museum buildings, and it will look beautiful in your home as well. It increases a home’s resale value and only looks better with age. There are many types of stones and many types of stone flooring. Whatever your needs, you are sure to find a stone floor that suits them.
The Process
- Before installing your floor, get all the furniture out of the room you’ll be working in. You may need a plumber to take care of your toilet and sink if you’re working on the bathroom. Have any gas appliances in the area safely disconnected, as well.
- Look at the surface that will go under your floor. The surface your stones will be laid down on top of is called the substrate, and it is vitally important to have a solid one that will not move or become full of water. If this is new construction, have a subfloor of concrete poured to provide you with a level surface to lay the stones on. If you’re remodeling an old floor, add a water-resistant backer board.
- Measure the length and width of the floor, then add 15% excess to allow for cutting and fitting of pieces. This is how much stone or tile you will need.
- Get the mortar or grout that works best with your type of stone or tile. Because stones have different properties – varying from porous sedimentary rock to glassy igneous rock – you will need a mortar that suits the water retention rate of your particular stone. Then apply your mortar to the substrate.
- Use chalk outlines on the subfloor to guide you in the laying of tiles or stones. Consider the layout of the room before you begin. Some tiles may need to be custom-cut to fit the contours of a remodeled home, and not all edges will be perfectly straight. Bear in mind also that the last tiles you lay down will probably be of uneven or irregular shape, so try to arrange for them to be in a little-seen area.
- Start pressing your tiles or stone down into the mortar.
- If you’re laying tiles: start laying them in the center of the room or along a straight edge.
- If you’re laying stones: lay large stones down side-by-side and fill in the gaps with smaller stones. You can use the hammer and chisel to knock pieces off larger stones, creating small ones you can use for filling.
- To keep the floor as level as possible, you can vary the amount of mortar to compensate for any varying thicknesses in the stones you are using. A stone floor will never be perfectly level, but you should check this periodically – otherwise, the effort you put into making the substrate even is effort wasted.
- Let the mortar cure, then consider filling the joints further with unsanded grout. This will take another 48 hours to cure.
- If your stone – like flagstone or other sedimentary rocks – has a porous surface, you’ll want to apply a seal. This will prevent the floor from soaking up and retaining stains and repels water as well. You don’t need a sealant if you’ve used marble or granite.
- Keep the room well-ventilated for the next few days to disperse dust and fumes.
Author’s Bio:
Akila Smith writes for Grand River Natural Stone, a company that deals with landscaping supplies. They are reliable dealers of armor stone, flagstone, interlocking pavers, natural stone Kitchener, steel beams, patio stones, and other landscaping supplies. For more details visit our official page!!!
Popular Articles
Three Places to Spend Money on the Exterior of Your Home
When you have the exterior of your home remodeled, you are investing, time, energy and convenience into the project and you want to make sure that...
105698 Views
Homemade Headboards-Make an Upholstered or Wooden Headboard
Homemade headboards can add a lot of personality to any bedroom. They can be coordinated with existing furniture and room decor or they can be the...
80496 Views
When to Use a Brush, Roller or Sponge Brush
Brushes are a good choice for painting trim and woodwork. They are also useful for cutting in the edges around the top and bottom edges and corners...
73115 Views
Creating a Cottage Kitchen with Bead Board
Kitchen decor can range from modern and bold to elegant and elaborate by using strategic kitchen pieces. One of the most popular decorating trends...
58898 Views
Gas Fireplace Diagnostics and Troubleshooting
Follow these steps for diagnosing and troubleshooting Gas Fireplaces repairs. For the average DIYer, this may seem intimidating, depending on the...
35888 Views
Latest Articles
Why Professional Heat Pump Installation is Key to Maximizing Efficiency and Longevity
Heat pumps are a highly efficient means of heating and cooling homes, reducing energy costs and contributing to environmental sustainability. To...
on Dec 15, 2025
Hydro Jetting Services: Unclog Your Pipes with the Power of Water
When faced with stubborn clogs and slow drains, conventional solutions often fall short. But with the innovation of hydro jetting services,...
on Dec 15, 2025
Why Professional Boiler Repair is Essential for Home Safety and Comfort
Maintaining a warm and safe home environment is paramount for any homeowner. Your home's boiler system plays a critical role in this, but what...
on Nov 5, 2025
How to Keep Your Home Warm in the Winter
How to Keep Your Home Warm in the WinterAs winter approaches, keeping your home warm becomes a priority for comfort and health. Efficient heating...
on Oct 29, 2025
Why Reliable Furnace Repair is Essential for Winter Comfort
As the cold season approaches, homeowners recognize the critical role that a well-functioning furnace plays in ensuring a warm and cozy living...
on Oct 29, 2025
Featured Articles
What Type of Licensed Contractor Should You Hire?
on Feb 28, 2017
Hire Contractors / Estimates

Looking for a specialty project? There are many types of contractors available for your home improvement needs. Finding the right type of...
Actions
Top Categories
- Garden / Landscaping / Patio — 264
- Kitchen / Bathrooms — 240
- Real Estate / Finance — 203
- Appliance / Repair — 186
- Interior Design / Decor — 184
- HVAC / Air Conditioning — 150
- Cleaning / Maintenance — 144
- Improvements / Remodeling — 131
- Plumbing / Basements — 120
- Floors / Tile / Hardwood — 116
- Safety / Security — 114
- Doors / Garages — 113
Articles Archive
More DIY Articles
Granite Countertop Measurements and Templates
Many kitchens have counters that are angled or rounded. For such counters, fabrication requires templates. Professional template-makers use thin...
Alternatives to the Traditional Lawn
With the recurring droughts in many parts of the country, it may be wise to consider alternatives to resource-hogging manicured turfgrass areas....
Why Garage Door Installation is not a DIY Task
There is no doubt that the main reason why do-it-yourselfers prefer to install garage doors alone is to save money. But do they really save money...
Your Quick Guide to Patching up a Vinyl Swimming Pool Liner
Vinyl pool liners are very popular for their elegant look, their flexibility and the fact that repairs are generally quite affordable and simple....
Repairing Holes Through Plaster Walls - 2 Methods
Many home owners have homes with plaster walls that often need minor repairs to fill cracks and holes develop as the home "settles" and...